Vivotek IB8354-C User Manual
Browse online or download User Manual for Security cameras Vivotek IB8354-C. Vivotek IB8354-C User`s manual
- Page / 207
- Table of contents
- BOOKMARKS
- User’s Manual 1
- 2 - User's Manual 2
- Overview 3
- Read Before Use 4
- Package Contents 4
- Front Panel 5
- Rear Panel 5
- Hardware Installation 6
- DI/DO Diagram 7
- General I/O Terminal Block 7
- 8 - User's Manual 8
- User's Manual - 9 9
- Hardware Reset 10
- Micro SD/SDHC Card Capacity 10
- Network Deployment 11
- Internet 12
- User's Manual - 13 13
- Software Installation 14
- Ready to Use 15
- Secure the Shooting Angle 16
- Accessing the Network Camera 17
- 18 - User's Manual 18
- User's Manual - 19 19
- Using RTSP Players 20
- Video Mode H.264 21
- Frame size 176 x 144 21
- Maximum frame rate 5 fps 21
- Intra frame period 1S 21
- 22 - User's Manual 22
- Main Page 23
- Video Control Buttons 24
- The viewing region of 25
- The largest frame size 25
- 26 - User's Manual 26
- Client Settings 28
- Date and time suffix 29
- File name prefix 29
- Joystick settings 30
- Enable Joystick 30
- Buttons Conguration 31
- Conguration 33
- System > General settings 34
- System time 35
- System > Homepage layout 36
- Theme Options 37
- 38 - User's Manual 38
- System > Logs 39
- System > Parameters 40
- System > Maintenance 41
- General settings > Restore 42
- Import/Export les 42
- User's Manual - 43 43
- 44 - User's Manual 44
- Media > Image 45
- 46 - User's Manual 46
- Image settings 47
- 48 - User's Manual 48
- Sensor Setting 1: 49
- For normal situations 49
- Sensor Setting 2: 49
- For special situations 49
- Weighted region 50
- Ignored region 50
- User's Manual - 51 51
- 52 - User's Manual 52
- Media > Video 53
- User's Manual - 55 55
- 56 - User's Manual 56
- User's Manual - 57 57
- Network > General settings 58
- User's Manual - 59 59
- 60 - User's Manual 60
- From the Internet In LAN 61
- 62 - User's Manual 62
- User's Manual - 63 63
- 64 - User's Manual 64
- HTTP streaming 65
- ► Microsoft 66
- 2, or 3> 66
- Video 16:38:01 2012/01/25 67
- 68 - User's Manual 68
- Network > DDNS 69
- 69
- 70 - User's Manual 70
- User's Manual - 71 71
- 72 - User's Manual 72
- QoS/DSCP (the DiffServ model) 73
- Network > SNMP 74
- Security > User accounts 75
- Security > HTTPS 76
- User's Manual - 77 77
- 78 - User's Manual 78
- User's Manual - 79 79
- 80 - User's Manual 80
- User's Manual - 81 81
- Note that 82
- Security > Access List 83
- 84 - User's Manual 84
- Administrator IP address 85
- Security > IEEE 802.1X 86
- User's Manual - 87 87
- PTZ > PTZ settings 88
- Home page in the E-PTZ Mode 89
- 90 - User's Manual 90
- User's Manual - 91 91
- Event > Event settings 92
- 2. Trigger 93
- 3. Action 94
- User's Manual - 95 95
- 96 - User's Manual 96
- User's Manual - 97 97
- 20130120 98
- 20130121 98
- 20130122 98
- 2013/01/20 99
- Add media 100
- User's Manual - 101 101
- Trigger Activation 101
- Video_20101213_100341 102
- User's Manual - 103 103
- Customized Script 104
- 2010/12/10 17:08:56 105
- 106 - User's Manual 106
- Percentage = 30% 106
- Video(TCP-AV) 106
- User's Manual - 107 107
- 108 - User's Manual 108
- Recording Settings 109
- Bandwidth 110
- Network storage path 111
- 112 - User's Manual 112
- 20130210 113
- 20130211 113
- 20130212 113
- 114 - User's Manual 114
- User's Manual - 115 115
- 2013/3/26 10:43:06 116
- Click to switch 117
- Appendix 118
- User's Manual - 119 119
- 4. Security Level 120
- <parameter pair> 121
- 122 - User's Manual 122
- User's Manual - 123 123
- 124 - User's Manual 124
- User's Manual - 125 125
- 7.1 system 126
- User's Manual - 127 127
- 128 - User's Manual 128
- User's Manual - 129 129
- 7.1.1 system.info 130
- 7.2 status 131
- 7.4 security 132
- 7.5 network 133
- 7.5.1 802.1x 134
- 7.5.2 QOS 135
- 7.5.3 IPV6 135
- 7.5.4 FTP 136
- 7.5.5 HTTP 136
- 7.5.6 HTTPS port 136
- 7.5.7 RTSP 137
- 7.5.8 RTP port 137
- 7.6 IP Filter 138
- 7.7 video input 139
- 140 - User's Manual 140
- User's Manual - 141 141
- 142 - User's Manual 142
- User's Manual - 143 143
- 7.8 IR cut control 144
- Softer 0 <-> 100 145
- 7.10 Time Shift settings 146
- User's Manual - 147 147
- 7.13 DDNS 148
- 7.13.1 Express link 149
- 7.14 UPnP presentation 149
- 7.15 UPnP port forwarding 149
- 7.16 System log 150
- 7.17 SNMP 150
- Group: layout 151
- 7.19 Privacy mask 152
- 7.20 Capability 153
- 154 - User's Manual 154
- User's Manual - 155 155
- 156 - User's Manual 156
- <boolean> 1 157
- Indicate whether to 157
- 158 - User's Manual 158
- User's Manual - 159 159
- 160 - User's Manual 160
- User's Manual - 161 161
- 162 - User's Manual 162
- User's Manual - 163 163
- 1280x1024 164
- User's Manual - 165 165
- 7.23 Customized event script 166
- 7.24 Event setting 166
- User's Manual - 167 167
- Group: server_i<0~4> 168
- User's Manual - 169 169
- 7.27 Recording 170
- User's Manual - 171 171
- 172 - User's Manual 172
- 7.28 HTTPS 173
- 7.31 ePTZ setting 174
- 7.30 Region of interest 174
- User's Manual - 175 175
- 176 - User's Manual 176
- User's Manual - 177 177
- 178 - User's Manual 178
- User's Manual - 179 179
- 180 - User's Manual 180
- 8.2 Capture Single Snapshot 181
- 8.3 Account Management 182
- 8.4 System Logs 183
- 8.5 Upgrade Firmware 183
- 8.6 ePTZ Camera Control 184
- User's Manual - 185 185
- 8.7 ePTZ Recall 186
- 8.8 ePTZ Preset Locations 186
- 8.9 IP Filtering 187
- 188 - User's Manual 188
- User's Manual - 189 189
- 8.11 Get SDP of Streams 190
- 8.12 Open the Network Stream 190
- 8.13 Storage managements 191
- 192 - User's Manual 192
- User's Manual - 193 193
- >0</offset > 194
- User's Manual - 195 195
- 196 - User's Manual 196
- 8.14 Virtual input 197
- 198 - User's Manual 198
- 8.16 Open Anystream 199
- 200 - User's Manual 200
- User's Manual - 201 201
- 8.17 Export Files 202
- 8.18 Upload Files 202
- 8.19 Media on demand 203
- 204 - User's Manual 204
- Technical Specications 205
- Technology License Notice 206
- User's Manual - 207 207
Summary of Contents
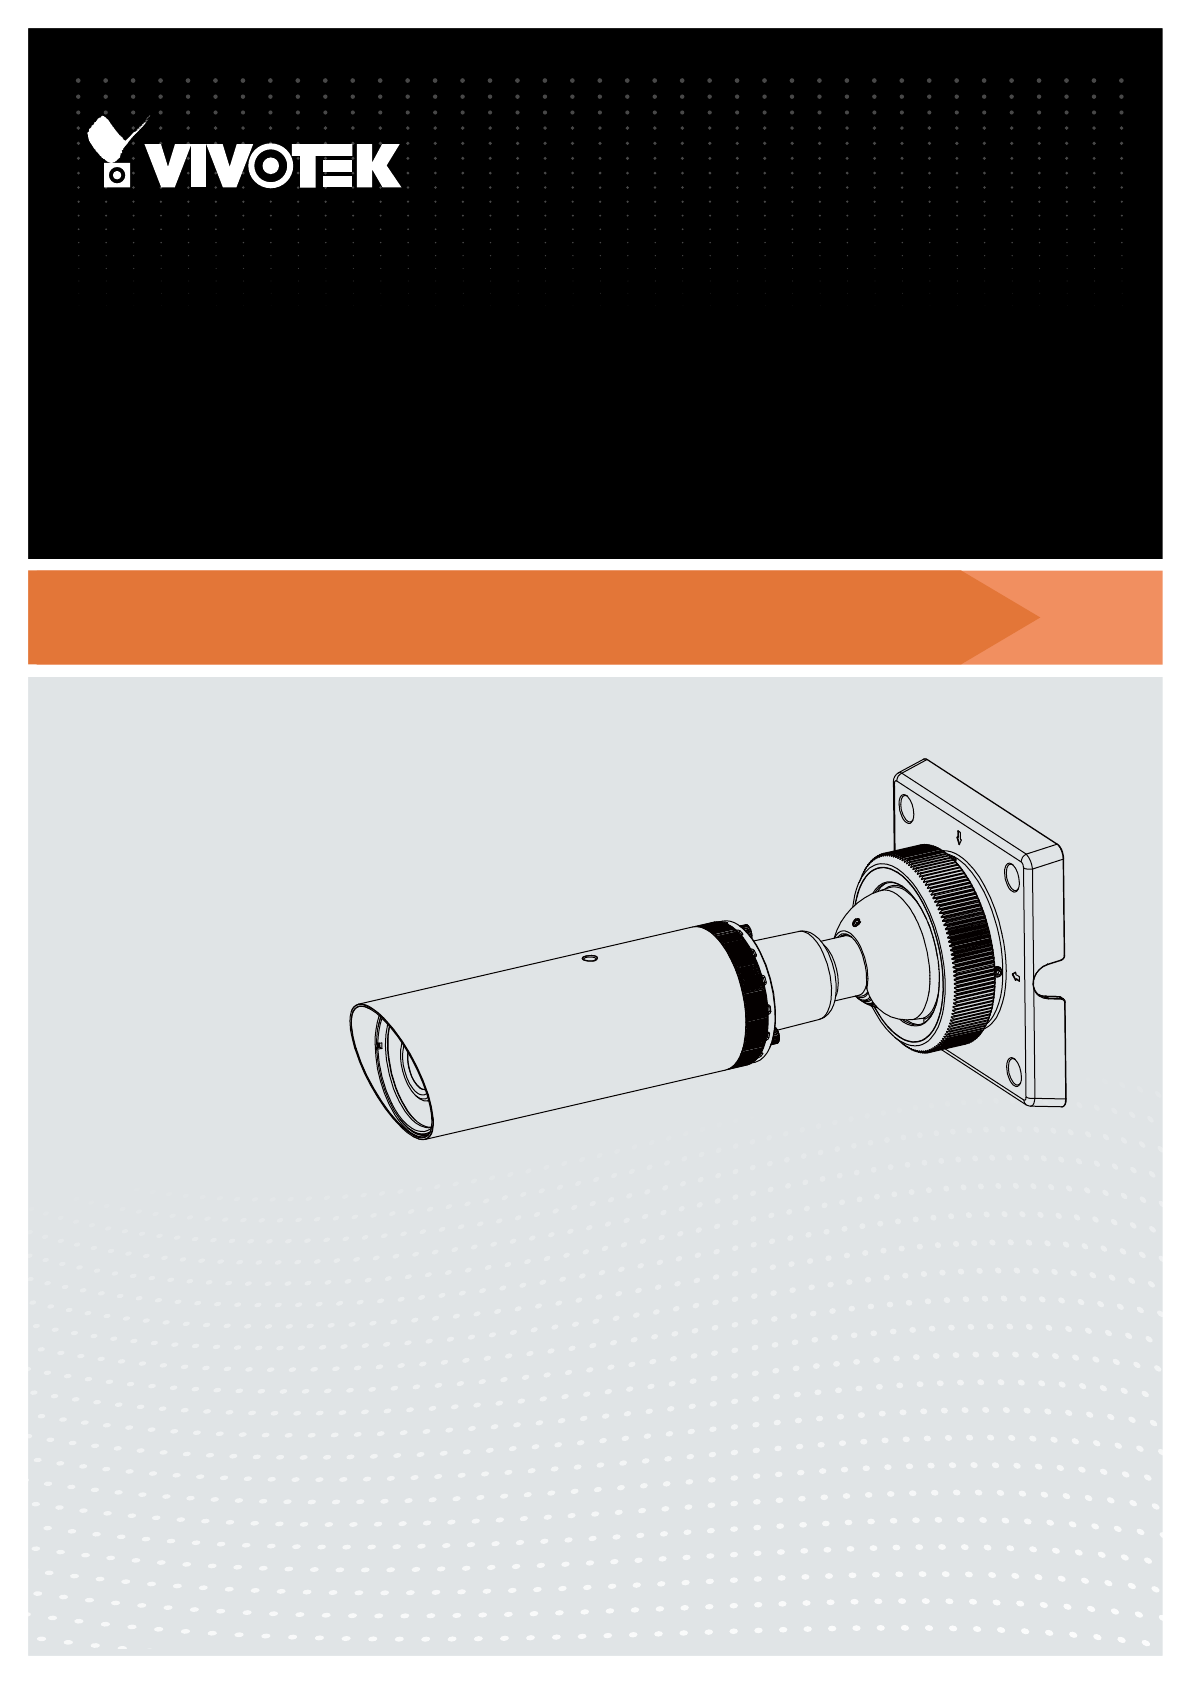
User’s ManualIB8354-CBullet Network CameraOutdoor • Day & Night • Weather-proof • Cable Management Rev. 1.0
VIVOTEK 10 - User's ManualHardware ResetThe reset button is used to reset the system or restore the factory default settings. Sometimes resetti
VIVOTEK 100 - User's ManualAdd mediaClick Add media to open the media setting window. You can specify the type of media that will be sent when
VIVOTEK User's Manual - 101 Add date and time sufx to the le nameSelect this option to add a date/time sufx to the le name. For examp
VIVOTEK 102 - User's Manual Maximum le sizeSpecify the maximum le size allowed. Some users may need to stitch the video clips together when
VIVOTEK User's Manual - 103 In the Event settings column, the Servers and Medias you congured will be listed; please make sure the Event ->
VIVOTEK 104 - User's ManualCustomized ScriptThis function allows you to upload a sample script (.xml le) to the webpage, which will save your
VIVOTEK User's Manual - 105 Applications > Motion detectionThis section explains how to congure the Network Camera to enable motion detect
VIVOTEK 106 - User's ManualA green bar indicates that even though motions have been detected, the event has not been triggered because the imag
VIVOTEK User's Manual - 107 NOTE► How does motion detection work?There are two motion detection parameters: Sensitivity and Percentage. In the
VIVOTEK 108 - User's ManualApplications > Digital inputConnect Digital input devices to the camera's terminal block, the camera will au
VIVOTEK User's Manual - 109 Recording > Recording settings This section explains how to congure the recording settings for the Network Cam
VIVOTEK User's Manual - 11 Network DeploymentGeneral Connection (PoE)When using a PoE-enabled switchThe Network Camera is PoE-compliant, allow
VIVOTEK 110 - User's ManualThe alarm trigger includes: motion detection and DI detection. Please refer to Event Settings on page 92. Pre-even
VIVOTEK User's Manual - 111 2. Destination You can select the SD card or network storage (NAS) for the recorded video files. If you have not c
VIVOTEK 112 - User's ManualIf successful, you will receive a test.txt le on the network storage server. 3. Enter a server name.4. Click Sav
VIVOTEK User's Manual - 113 To remove a recording setting from the list, select a recording name from the drop-down list and click Delete. Cl
VIVOTEK 114 - User's ManualLocal storage > SD card managementThis section explains how to manage the local storage on the Network Camera. He
VIVOTEK User's Manual - 115 Local storage > Content managementThis section explains how to manage the content of recorded videos on the Net
VIVOTEK 116 - User's ManualSearch ResultsThe following is an example of search results. There are four columns: Trigger time, Media type, Trigg
VIVOTEK User's Manual - 117 Lock/Unlock: Select the desired search results, then click this button. The selected items will become Locked
VIVOTEK 118 - User's ManualAppendix URL Commands for the Network Camera1. OverviewFor some customers who already have their own web site or web
VIVOTEK User's Manual - 119 URL Command Document for All Series 5
VIVOTEK 12 - User's ManualInternet connection via a routerBefore setting up the Network Camera over the Internet, make sure you have a router a
VIVOTEK 120 - User's ManualURL Command Document for All Series 6
VIVOTEK User's Manual - 121 URL Command Document for All Series 7
VIVOTEK 122 - User's ManualURL Command Document for All Series 8
VIVOTEK User's Manual - 123 URL Command Document for All Series 9
VIVOTEK 124 - User's ManualURL Command Document for All Series 10
VIVOTEK User's Manual - 125 URL Command Document for All Series 11
VIVOTEK 126 - User's ManualURL Command Document for All Series 12
VIVOTEK User's Manual - 127 URL Command Document for All Series 13
VIVOTEK 128 - User's ManualURL Command Document for All Series 14
VIVOTEK User's Manual - 129 URL Command Document for All Series 15
VIVOTEK User's Manual - 13 Congure the router, virtual server or rewall, so that the router can forward any data com-ing into a precongured
VIVOTEK 130 - User's ManualURL Command Document for All Series 16
VIVOTEK User's Manual - 131 URL Command Document for All Series 17
VIVOTEK 132 - User's ManualURL Command Document for All Series 18
VIVOTEK User's Manual - 133 URL Command Document for All Series 19
VIVOTEK 134 - User's ManualURL Command Document for All Series 20
VIVOTEK User's Manual - 135 URL Command Document for All Series 21
VIVOTEK 136 - User's ManualURL Command Document for All Series 22
VIVOTEK User's Manual - 137 URL Command Document for All Series 23
VIVOTEK 138 - User's ManualURL Command Document for All Series 24
VIVOTEK User's Manual - 139 URL Command Document for All Series 25
VIVOTEK 14 - User's ManualSoftware InstallationInstallation Wizard 2 (IW2), a software included in the product CD, helps you set up your Networ
VIVOTEK 140 - User's ManualURL Command Document for All Series 26
VIVOTEK User's Manual - 141 URL Command Document for All Series 27
VIVOTEK 142 - User's ManualURL Command Document for All Series 28
VIVOTEK User's Manual - 143 URL Command Document for All Series 29
VIVOTEK 144 - User's ManualURL Command Document for All Series 30
VIVOTEK User's Manual - 145 URL Command Document for All Series 31
VIVOTEK 146 - User's ManualURL Command Document for All Series 32
VIVOTEK User's Manual - 147 URL Command Document for All Series 33
VIVOTEK 148 - User's ManualURL Command Document for All Series 34
VIVOTEK User's Manual - 149 URL Command Document for All Series 35
VIVOTEK User's Manual - 15 Ready to Use1. A browser session with the Network Camera should prompt as shown below.2. You should be able to see
VIVOTEK 150 - User's ManualURL Command Document for All Series 36
VIVOTEK User's Manual - 151 URL Command Document for All Series 37
VIVOTEK 152 - User's ManualURL Command Document for All Series 38
VIVOTEK User's Manual - 153 URL Command Document for All Series 39
VIVOTEK 154 - User's ManualURL Command Document for All Series 40
VIVOTEK User's Manual - 155 URL Command Document for All Series 41
VIVOTEK 156 - User's ManualURL Command Document for All Series 42
VIVOTEK User's Manual - 157 URL Command Document for All Series 43
VIVOTEK 158 - User's ManualURL Command Document for All Series 44
VIVOTEK User's Manual - 159 URL Command Document for All Series 45
VIVOTEK 16 - User's ManualSecure the Shooting AngleWhen you are done with tuning the eld of view and obtain a satisfactory image, tighten the
VIVOTEK 160 - User's ManualURL Command Document for All Series 46
VIVOTEK User's Manual - 161 URL Command Document for All Series 47
VIVOTEK 162 - User's ManualURL Command Document for All Series 48
VIVOTEK User's Manual - 163 URL Command Document for All Series 49
VIVOTEK 164 - User's ManualURL Command Document for All Series 50
VIVOTEK User's Manual - 165 URL Command Document for All Series 51
VIVOTEK 166 - User's ManualURL Command Document for All Series 52
VIVOTEK User's Manual - 167 URL Command Document for All Series 53
VIVOTEK 168 - User's ManualURL Command Document for All Series 54
VIVOTEK User's Manual - 169 URL Command Document for All Series 55
VIVOTEK User's Manual - 17 Accessing the Network CameraThis chapter explains how to access the Network Camera through web browsers, RTSP playe
VIVOTEK 170 - User's ManualURL Command Document for All Series 56
VIVOTEK User's Manual - 171 URL Command Document for All Series 57
VIVOTEK 172 - User's ManualURL Command Document for All Series 58
VIVOTEK User's Manual - 173 URL Command Document for All Series 59
VIVOTEK 174 - User's ManualURL Command Document for All Series 60
VIVOTEK User's Manual - 175 URL Command Document for All Series 61
VIVOTEK 176 - User's ManualURL Command Document for All Series 62
VIVOTEK User's Manual - 177 URL Command Document for All Series 63
VIVOTEK 178 - User's ManualURL Command Document for All Series 64
VIVOTEK User's Manual - 179 URL Command Document for All Series 65
VIVOTEK 18 - User's Manual► By default, the Network Camera is not password-protected. To prevent unauthorized access, it is highly recommended
VIVOTEK 180 - User's ManualURL Command Document for All Series 66
VIVOTEK User's Manual - 181 URL Command Document for All Series 67
VIVOTEK 182 - User's ManualURL Command Document for All Series 68
VIVOTEK User's Manual - 183 URL Command Document for All Series 69
VIVOTEK 184 - User's ManualURL Command Document for All Series 70
VIVOTEK User's Manual - 185 URL Command Document for All Series 71
VIVOTEK 186 - User's ManualURL Command Document for All Series 72
VIVOTEK User's Manual - 187 URL Command Document for All Series 73
VIVOTEK 188 - User's ManualURL Command Document for All Series 74
VIVOTEK User's Manual - 189 URL Command Document for All Series 75
VIVOTEK User's Manual - 19 •Currently the Network Camera utilizes 32-bit ActiveX plugin. You CAN NOT open a management/view session with the
VIVOTEK 190 - User's ManualURL Command Document for All Series 76
VIVOTEK User's Manual - 191 URL Command Document for All Series 77
VIVOTEK 192 - User's ManualURL Command Document for All Series 78
VIVOTEK User's Manual - 193 URL Command Document for All Series 79
VIVOTEK 194 - User's ManualURL Command Document for All Series 80
VIVOTEK User's Manual - 195 URL Command Document for All Series 81
VIVOTEK 196 - User's ManualURL Command Document for All Series 82
VIVOTEK User's Manual - 197 URL Command Document for All Series 83
VIVOTEK 198 - User's ManualURL Command Document for All Series 84
VIVOTEK User's Manual - 199 URL Command Document for All Series 85
VIVOTEK 2 - User's ManualTable of Contents Overview ...
VIVOTEK 20 - User's ManualUsing RTSP PlayersTo view the streaming media using RTSP players, you can use one of the following players that suppo
VIVOTEK 200 - User's ManualURL Command Document for All Series 86
VIVOTEK User's Manual - 201 URL Command Document for All Series 87
VIVOTEK 202 - User's ManualURL Command Document for All Series 88
VIVOTEK User's Manual - 203 URL Command Document for All Series 89
VIVOTEK 204 - User's ManualURL Command Document for All Series 90
VIVOTEK User's Manual - 205 Technical SpecicationsAlarm TriggersAlarm EventsConnectorsLED IndicatorPower InputPower ConsumptionDimensionsWeig
VIVOTEK 206 - User's ManualTechnology License NoticeAMR-NB StandardTHIS PRODUCT IS LICENSED UNDER THE AMR-NB STANDARD PATENT LICENSE AGREEMENT.
VIVOTEK User's Manual - 207 Electromagnetic Compatibility (EMC)FCC StatementThis device compiles with FCC Rules Part 15. Operation is subject
VIVOTEK User's Manual - 21 Using 3GPP-compatible Mobile DevicesTo view the streaming media through 3GPP-compatible mobile devices, make sure t
VIVOTEK 22 - User's ManualUsing VIVOTEK Recording SoftwareThe product software CD also contains an ST7501 recording software, allowing simultan
VIVOTEK User's Manual - 23 Main PageThis chapter explains the layout of the main page. It is composed of the following sections: VIVOTEK
VIVOTEK 24 - User's ManualConguration AreaClient Settings: Click this button to access the client setting page. For more information, please r
VIVOTEK User's Manual - 25 Global View: Click on this item to display the Global View window. The Global View window contains a full view imag
VIVOTEK 26 - User's ManualVideo Control Buttons: Depending on the Network Camera model and Network Camera conguration, some buttons may not be
VIVOTEK User's Manual - 27 The following window is displayed when the video mode is set to MJPEG:Video Title: The video title can be congur
VIVOTEK 28 - User's ManualClient SettingsThis chapter explains how to select the stream transmission mode and saving options on the local compu
VIVOTEK User's Manual - 29 MP4 Saving OptionsUsers can record live video as they are watching it by clicking Start MP4 Recording on the main
VIVOTEK User's Manual - 3 Electromagnetic Compatibility (EMC) ...
VIVOTEK 30 - User's ManualJoystick settingsEnable JoystickConnect a joystick to a USB port on your management computer. Supported by the plug-i
VIVOTEK User's Manual - 31 Buttons CongurationIn the Button Conguration window, the left column shows the actions you can assign, and the ri
VIVOTEK 32 - User's ManualButtons CongurationClick the Congure Buttons button, a window will prompt as shown below. Please follow the steps b
VIVOTEK User's Manual - 33 CongurationClick Configuration on the main page to enter the camera setting pages. Note that only Administrators
VIVOTEK 34 - User's ManualSystem > General settingsThis section explains how to congure the basic settings for the Network Camera, such as
VIVOTEK User's Manual - 35 System timeKeep current date and time: Select this option to preserve the current date and time of the Network
VIVOTEK 36 - User's ManualSystem > Homepage layout This section explains how to set up your own customized homepage layout. General settings
VIVOTEK User's Manual - 37 Theme OptionsHere you can change the color of your homepage layout. There are three types of preset patterns for yo
VIVOTEK 38 - User's Manual Follow the steps below to set up the customed homepage:1. Click Custom on the left column.2. Click the eld where y
VIVOTEK User's Manual - 39 System > Logs This section explains how to congure the Network Camera to send the system log to a remote server
VIVOTEK 4 - User's ManualRead Before UseThe use of surveillance devices may be prohibited by law in your country. The Network Camera is not onl
VIVOTEK 40 - User's ManualAccess logAccess log displays the access time and IP address of all viewers (including operators and administrators)
VIVOTEK User's Manual - 41 System > MaintenanceThis chapter explains how to restore the Network Camera to factory default, upgrade rmware
VIVOTEK 42 - User's ManualGeneral settings > RestoreThis feature allows you to restore the Network Camera to factory default settings.Networ
VIVOTEK User's Manual - 43 3. Open the le with Microsoft® Notepad and locate your time zone; set the start and end time of DST. When complet
VIVOTEK 44 - User's ManualThe following message is displayed when attempting to upload an incorrect le format.Export language file: Click to e
VIVOTEK User's Manual - 45 Media > Image This section explains how to configure the image settings of the Netw
VIVOTEK 46 - User's ManualDay/Night SettingsSwitch to B/W in night modeSelect this to enable the Network Camera to automatically switch to Blac
VIVOTEK User's Manual - 47 Image settingsOn this page, you can tune the White balance and Image adjustment.White balance: Adjust the value for
VIVOTEK 48 - User's ManualNote that the Preview button has been cancelled, all changes made to image settings is directly shown on screen. You
VIVOTEK User's Manual - 49 Exposure On this page, you can set the Exposure measurement window, Exposure level, Exposure mode, Exposure time,
VIVOTEK User's Manual - 5 Front PanelRear PanelEthernet 10/100 RJ45 PlugGeneral I/O Terminal BlockIR LEDsLensReset ButtonMicroSD/SDHC Card Sl
VIVOTEK 50 - User's ManualExposure control: Exposure level: You can manually set the Exposure level, which ranges from -2.0 to +2.0 (dark to b
VIVOTEK User's Manual - 51 Please follow the steps below to set up a prole:1. Select Enable this prole.2. Select the applicable mode: D
VIVOTEK 52 - User's ManualPrivacy mask Click Privacy Mask to open the settings page. On this page, you can block out sensitive zones to addre
VIVOTEK User's Manual - 53 Media > VideoStream settings This Network Camera supports multiple streams with frame sizes ranging from 176 x
VIVOTEK 54 - User's ManualMedia > Video► All the items in the “Region of Interest” should not be larger than the “Output Frame Size
VIVOTEK User's Manual - 55 Click the stream item to display the detailed information. The maximum frame size will follow your settings in the
VIVOTEK 56 - User's ManualThe frame rate will decrease if you select a higher resolution. Intra frame periodDetermine how often for rmware to
VIVOTEK User's Manual - 57 If JPEG mode is selected, the Network Camera sends consecutive JPEG images to the client, producing a moving effect
VIVOTEK 58 - User's ManualNetwork > General settingsThis section explains how to configure a wired network connection for the Network Camera
VIVOTEK User's Manual - 59 Primary DNS: The primary domain name server that translates hostnames into IP addresses.Secondary DNS: Secondary do
VIVOTEK 6 - User's ManualHardware InstallationIMPORTANT:The diameters of the cable holes on the rubber seal are shown on the right. Please prop
VIVOTEK 60 - User's Manual► If the default ports are already used by other devices connected to the same router, the Network Camera will select
VIVOTEK User's Manual - 61 4. In the Networking Services dialog box, select Universal Plug and Play and click OK. 5. Click Next
VIVOTEK 62 - User's ManualEnable IPv6Select this option and click Save to enable IPv6 settings. Please note that this only works if your networ
VIVOTEK User's Manual - 63 Please follow the steps below to link to an IPv6 address:1. Open your web browser.2. Enter the link-global or link-
VIVOTEK 64 - User's ManualPortHTTPS port: By default, the HTTPS port is set to 443. It can also be assigned to another port number betwe
VIVOTEK User's Manual - 65 Network > Streaming protocols HTTP streaming To utilize HTTP authentication, make sure that your have set a pas
VIVOTEK 66 - User's ManualURL command -- http://<ip address>:<http port>/<access name for stream 1, 2, or 3>For example, when
VIVOTEK User's Manual - 67 Authentication: Depending on your network security requirements, the Network Camera provides three types of securit
VIVOTEK 68 - User's ManualMulticast settings for streams: Click the items to display the detailed configuration information. Select the Alwa
VIVOTEK User's Manual - 69 Network > DDNS This section explains how to congure the dynamic domain name service for the Network Camera. DD
VIVOTEK User's Manual - 7 DI/DO DiagramPlease refer to the following illustration for the connection method.+12VDigital inputPIN 2GroundPIN 1G
VIVOTEK 70 - User's ManualManual setupDDNS: Dynamic domain name serviceEnable DDNS: Select this option to enable the DDNS setting.Provider: Sel
VIVOTEK User's Manual - 71 [Register] Successfully Your account information has been mailed to registered e-mail address4. Select Enable D
VIVOTEK 72 - User's ManualNetwork > QoS (Quality of Service) Quality of Service refers to a resource reservation control mechanism, which
VIVOTEK User's Manual - 73 QoS/DSCP (the DiffServ model)DSCP-ECN denes QoS at Layer 3 (Network Layer). The Differentiated Services (DiffServ)
VIVOTEK 74 - User's ManualNetwork > SNMP (Simple Network Management Protocol)
VIVOTEK User's Manual - 75 Security > User accountsThis section explains how to enable password protection and create multiple accounts.Roo
VIVOTEK 76 - User's ManualSecurity > HTTPS (Hypertext Transfer Protocol over SSL)
VIVOTEK User's Manual - 77 5. Click Save to preserve your conguration, and your current session with the camera will change to the encrypted
VIVOTEK 78 - User's ManualCreate certificate request and install1. Select the option from the Method pull-down menu. 2. Click Create certicate
VIVOTEK User's Manual - 79 5. Look for a trusted certicate authority, such as Symantec’s VeriSign Authentication Services, that issues digita
VIVOTEK 8 - User's Manual6. Install and tighten the camera's rear cover. 7. Tighten the rubber seal, seal clamp, and cap nut of the waterp
VIVOTEK 80 - User's Manual7. Open a new edit, paste the certicate contents, and press ENTER at the end of the contents to add an empty line. 8
VIVOTEK User's Manual - 81 9. Save the edit using the “.crt” extension, using a le name like “CAcert.crt.” 10. Return to the original rmware
VIVOTEK 82 - User's Manual11. When the certifice file is successfully loaded, its status will be stated as Active. Note that a certicate must
VIVOTEK User's Manual - 83 Security > Access List This section explains how to control access permission by verifying the client PC’s IP a
VIVOTEK 84 - User's Manual Refresh: Click this button to refresh all current connections. Add to deny list: You can select entries from th
VIVOTEK User's Manual - 85 Network: This rule allows the user to assign a network address and corresponding subnet mask to the Allow/Deny List
VIVOTEK 86 - User's ManualSecurity > IEEE 802.1X Enable this function if your network environment uses IEEE 802.1x, which is a port-based
VIVOTEK User's Manual - 87 3. When all settings are complete, move the Network Camera to the protected LAN by connecting it to an 802.1x enabl
VIVOTEK 88 - User's ManualPTZ > PTZ settingsThis section explains how to control the Network Camera’s Pan/Tilt/Zoom operation. There are two
VIVOTEK User's Manual - 89 Home page in the E-PTZ Mode The e-Preset Positions will also be displayed on the home page. Select one from the dr
VIVOTEK User's Manual - 9 10. Loosen the fastening ring on the mount bracket, and aim the camera at the area of your interest. When done, tigh
VIVOTEK 90 - User's ManualPatrol settingsYou can select some preset positions for the Network Camera to patrol.Please follow the steps below to
VIVOTEK User's Manual - 91 NOTE►The Preset Positions will also be displayed on the Home page. Select one from the Go to menu, and the Network
VIVOTEK 92 - User's ManualEvent > Event settingsThis section explains how to congure the Network Camera to responds to particular situation
VIVOTEK User's Manual - 93 Event name: Enter a name for the event setting. Enable this event: Select this option to enable the event settin
VIVOTEK 94 - User's Manual Camera tampering detectionThis option allows the Network Camera to trigger when the camera detects that is is being
VIVOTEK User's Manual - 95 Add serverIt is necessary to congure the server and media settings so that the Network Camera will know what actio
VIVOTEK 96 - User's ManualTo verify if the email settings are correctly congured, click Test. The result will be shown in a pop-up window. If
VIVOTEK User's Manual - 97 Passive modeMost firewalls do not accept new connections initiated from external requests. If the FTP server supp
VIVOTEK 98 - User's ManualNetwork storage: Select to send the media les to a networked storage when a trigger is activated. Please refer to NA
VIVOTEK User's Manual - 99 Click 20130120 to open the directory:Click to delete selected itemsClick to delete all recorded dataClick to go
Related products and manuals for Security cameras Vivotek IB8354-C
 (24 pages)
 (27 pages)


 (2 pages) (12 pages)
(24 pages)
(227 pages)
(219 pages)
(44 pages)
(10 pages)
(11 pages)
(2 pages) (12 pages)
(24 pages)
(227 pages)
(219 pages)
(44 pages)
(10 pages)
(11 pages)
© 2020, manymanuals.com. All rights reserved. | 1.472 s |
 Manymanuals.com
 Manymanuals.de
 Manymanuals.fr
 Manymanuals.it
 Manymanuals.pl
 Manymanuals.cz
 Manymanuals.es
 Manymanuals-pt.com
Comments to this Manuals